Thursday, December 31, 2020

Social Stamping Blog Hop - Oh 2020!


Hello again and welcome to the Social Stamping Blog Host where I am joined by a group of talented crafters from around Australia and New Zealand.

The group was started by my lovely friend and fellow Stampin' Up! demonstrator Kelly Kent as a way of keeping connected, creating and sharing while we are all being socially distant.

You may have arrived from seeing Nicole's gorgeous creation but if you started here, click the 'Next' button at the bottom of this post to continue hopping.

The theme Kelly has chosen for us this month is 'Oh 2020'.

 My favourite class this year was the Box Of Sunshine Paper Pumpkin Kit. With many people in Isolation and Lockdown, Stampin' Up! created a special Paper Pumpkin Kit which was also available here in Australia. The kit came with extra products to decorate the box and and then fill with treats and goodies to gift to someone. My ladies came to class with all the yellow/sunshine-themed goodies they had collacted and we filled our boxes after we had made the cards in the kit. We had so many laughs and such good fun!

I really loved the idea of sending someone a 'Box of Sunshine' to brighten their day. After I had gifted my box, I realised that there were lots of others who were deserving of a little sunshine in their life, so I started to make mini boxes of sunshine!

 I have made various outer decorations and used whatever papers I could find in my stash. For this one I used a sponge brayer to colour the box and then I used used a very old mask for the sunburst which I sponged with Daffodil Delight. For the sentiment, I used a piece of Shimmery White cardstock which I sponged with Daffodil Delight and Calypso Coral and then splashed some drops of water to create a textured background for the sentiment.

Mini Paper Pumpkin Box

Box filled with goodies and ready to go
It's amazing how much you can fit into one of these cute little boxes
Tea Bag Holder

  
Notepad
Sunflower Seed Matchbook
 
Mini Lego Brick
Chocolate Bar
 
The following photos are other mini goodies which I made for the Mini Paper Pumpkin boxes and for my large Paper Pumpkin box
 
Bag of Smarties (we ate the other colours during class!)
Merci Treat Box
  
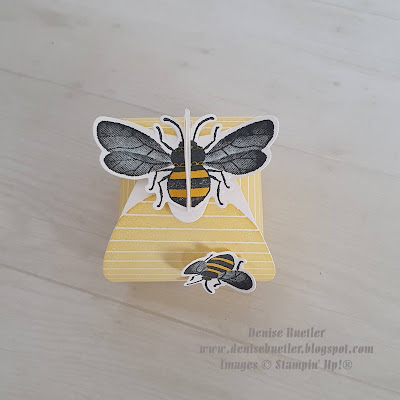
Mini Curvy Keepsake Beehive
Lip Balm Holder

I am still enjoying making up boxes and thinking of new treats I can put in them.

 I hope you have enjoyed seeing my project today. Click the 'Next' button to see what my very talented friend Lisa has created for you.

 
Thanks for stopping by and hopping with us today. If you get lost or if there's a broken link, you can find a link to the next blog in Kelly's main post here


Sunday, December 6, 2020

ESAD Goodbye Mini Catalogue Blog Hop


Hello and welcome to another ESAD Blog Hop. As the year slowly draws to an end, it's time to say goodbye to the August-December 2020 Mini Catalogue to make way for all the fabulous new products in the upcoming January-June 2021 Mini Catalogue.

I am joined today by many talented demonstrators from around Australia and New Zealand and I hope you enjoy all our projects using our retiring favourites from the August-December Mini Catalogue.

You may have come from seeing my very dear and talented friend, Nicole's awesome creation but if you started here, click the 'Next' Button at the bottom of this post to continue hopping. Make sure you visit everyone - there are lots of great projects and you won't want to miss any!

 One of my favourite products in the August-December 2020 Mini Catalogue is the Poinsettia Petals Bundle. It is so versatile as you can make various different sizes of Poinsettia and I have used it to make cards, tags, tree ornaments, table decorations, gift boxes and decorating gift bags.

I love Easel fold cards and there are so many different variations that you can make and even the simplest ones have a great 'wow' effect for the receiver.

For my project I made a Christmas card using a design by Nicole of  'The Dimensionals' which you can see here.

I especially love the Plush Poinsettia Specialty Designer Series Paper that I used for the 'frame'. 

 I two-step stamped the background with Memento Tuxedo Black and Balmy Blue ink using the berry sprig and berries stamps.

I die cut 3 sizes of petals, then curved them downwards slightly with a bone folder. I placed Dimensionals between the petals to give the flower more structure.
The Poinsettia is attached to the front of the stamped mountain fold of the card base and placed so that it overlaps the card front cut-out. This is what holds the front of the easel closed.
 

Products used are available in my Online shop here

 Product List

Next up is Cheryl. Click on the 'Next' button to see what fabulous project she has to show you.

Thanks for stopping by and hopping with us today. If you get lost or if there's a broken link, you can find a link to the next blog in the list of participants below.


Participant List


1.


1.