Sunday, February 6, 2022

ESAD Mini Catalogue and Sale-a-Bration Blog Hop

Today I have joined  up with a group of fellow Stampin' Up! Demonstrators to showcase products from the new 2022 January-June Mini Catalogue which is available from the 4th January until the 30th of June and the Sale-A-Bration Brochure which is available from the 4th January until the 28th February. For every $90 AUD you spend during the Sale-A-Bration promotion period, you get to choose from fabulous free products.
If you haven't already got yours yet and live in Australia, contact me for your free copy.

You may have arrived from seeing my lovely friend from Queensland Sharon's gorgeous creation but if you started here, click the 'Next' Button at the bottom of this post to continue hopping. Make sure you visit everyone - there are lots of great projects and you won't want to miss any!


 There are so many fabulous products in the new Mini Catalogue it was difficult to choose which one to showcase. Living close to the beach, I love all things beach and ocean themed so when I saw the Seas The Day Bundle, I knew I had to have it!

My project for today is a Trifold Window Card which lends itself perfectly for my underwater scene.
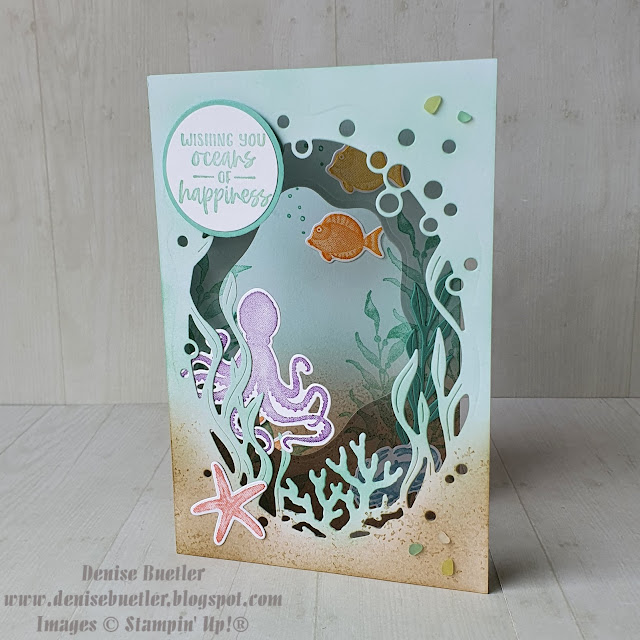
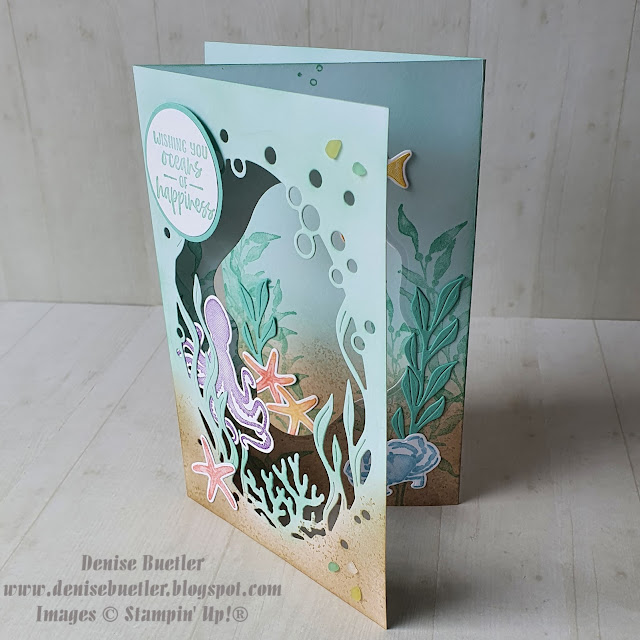

For my card base I used a piece of Basic White cardstock 29.7cm x 14.85cm scored at 9.9cm and 19.9 cm.

I used my Blending Brushes with Crumb Cake ink for the lower part and Coastal Cabana ink for the upper part to create my background scene on the card front. I stamped the 'sand' with 2nd generation Crumb Cake using a stamp from the Seascape stamp set.

I repeated this for the centre and back panel of my card. I used my Stamparatus to stamp the seagrass so that I could position the images in the exact same place on both panels. This ensured that there was a seamless crossover of images when the card is lying flat and standing.
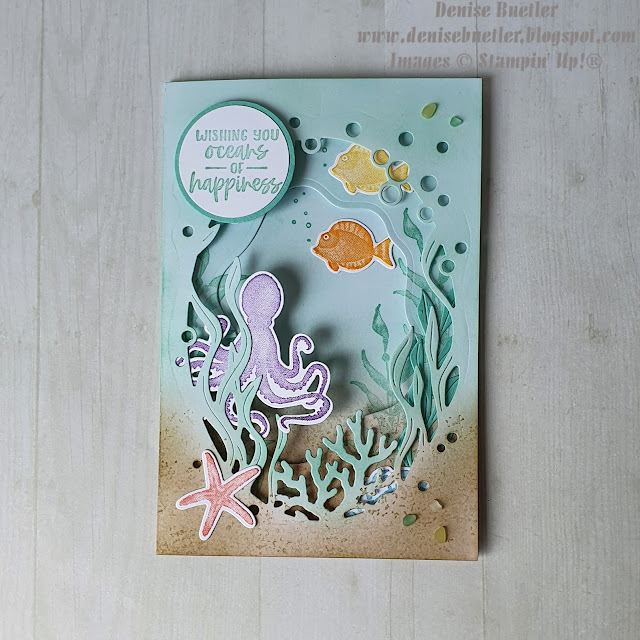

Next I die cut the front panel using the fabulous detailed die from the Seas The Day Bundle. Then I cut the middle panel opening using the Layering Diorama Dies.
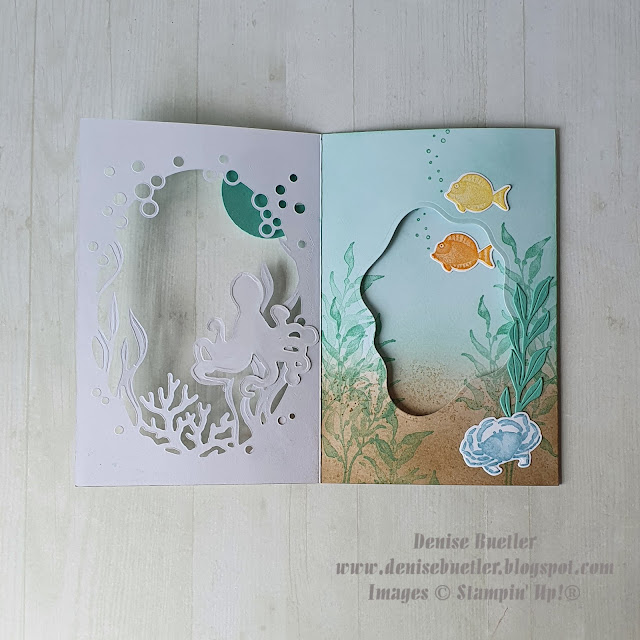

I then stamped and die cut my underwater creatures and adhered them to the 3 card panels.
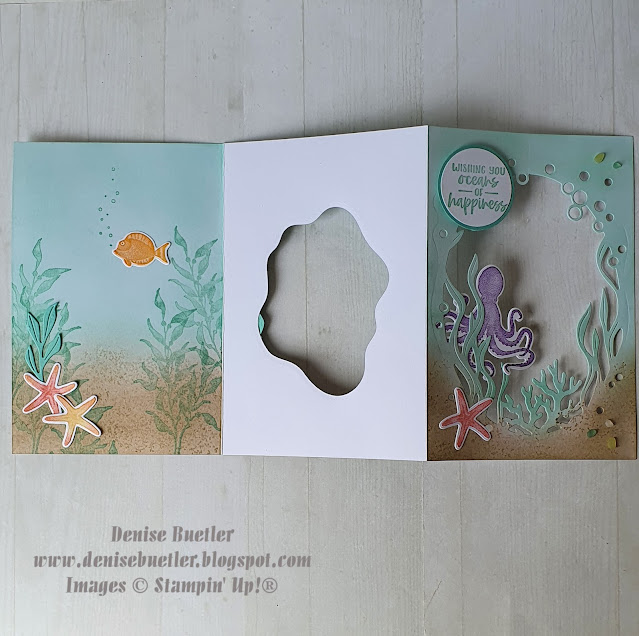

Lastly I stamped the sentiment on Basic White Cardstock with Coastal Cabana ink. I punched this out with the 1 3/8" circle punch and layered it onto a piece of Coastal Cabana cardstock punched with the 1 1/2" circle punch.

I finished my card front with some of the gorgeous Faux Seaglass Shapes embellishments.
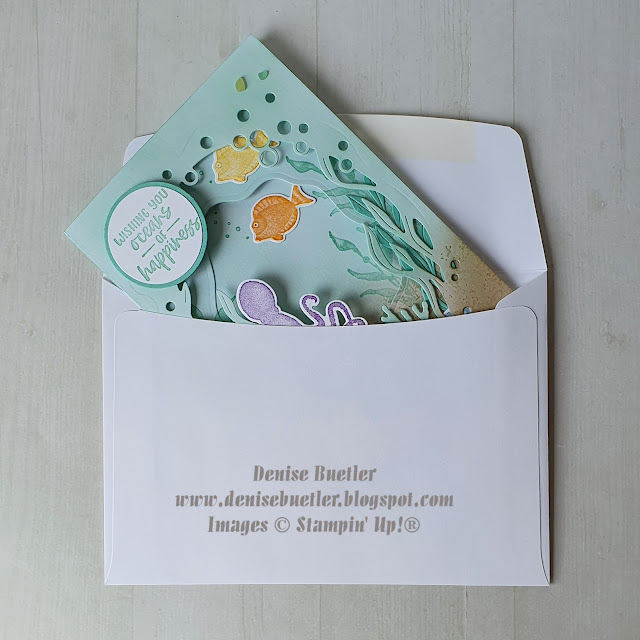


 All products used are available to purchase in my Online Shop here.


  Product List

I hope you have enjoyed seeing my project and have lots of fun creating your own!

Next up is the very talented Sue who I'm sure has an inspiring project to show you.


Thanks for stopping by and hopping with us today. If you get lost or if there's a broken link, you can find a link to the next blog in the list of participants below.


Blog Participant List

1.       Sharni Haines

2.       Nicole Wilson

3.       Cheryl Algie

4.       Melissa Gifford

5.       Lou Kitzelman

6.       Rochelle Laird – Smith

7.       Sharon Dalton

8.       Denise Buetler  (you are currently here)

9.       Sue Vine

10.   Tracy Held

11.    Monica Formosa

 Di Barnes


Saturday, May 29, 2021

Social Stamping Blog Hop - Subtles


Hello again and welcome to the Social Stamping Blog Host where I am joined by a group of talented crafters from around Australia and New Zealand.

The group was started by my lovely friend and fellow Stampin' Up! demonstrator Kelly Kent as a way of keeping connected, creating and sharing while we were all being socially distant due to Covid-19.

You may have arrived from seeing Lisa's gorgeous creation but if you started here, click the 'Next' button at the bottom of this post to continue hopping.

The theme Kelly has chosen for us this month is 'Subtles'.

Subtles is one of Stampin' Up!'s colour families and, as the name suggests, features colours with soft tones. One of my absolute favourite colours, 'Highland Heather', belongs to this family and I have used it to create today's project.


I love making gift boxes to match my cards. This box measures 10.5cms long x 7cms wide x 4.4cms high so it can hold quite a lot of goodies.


I originally designed this card and box as part of my 'Quite Curvy' product-based class earlier this year but I liked it so much, I have re-created it several times in various different colours.


Products used (with the exception of the Layering Ovals, Gingham Gala Sequins and Big Shot which are now retired) are available to purchase from my Online Shop here

I hope you have enjoyed seeing my project today. Click the 'Next' button to see what my talented friend Sandra from New Zealand has created for you


Thanks for stopping by and hopping with us today. If you get lost or if there's a broken link, you can find a link to the next blog in Kelly's main post here